Member Permissions
Use Member Permissions to choose which members can be given each duty, to set how members get duty reminders, and to record dates when a member cannot serve.
Where: In the menu, click Duties, then Member Permissions. The screen has three tabs: Member Permissions, Reminders and Unavailabilities.
Who can use this: Your role needs Edit access to Member Permissions in Role Management.
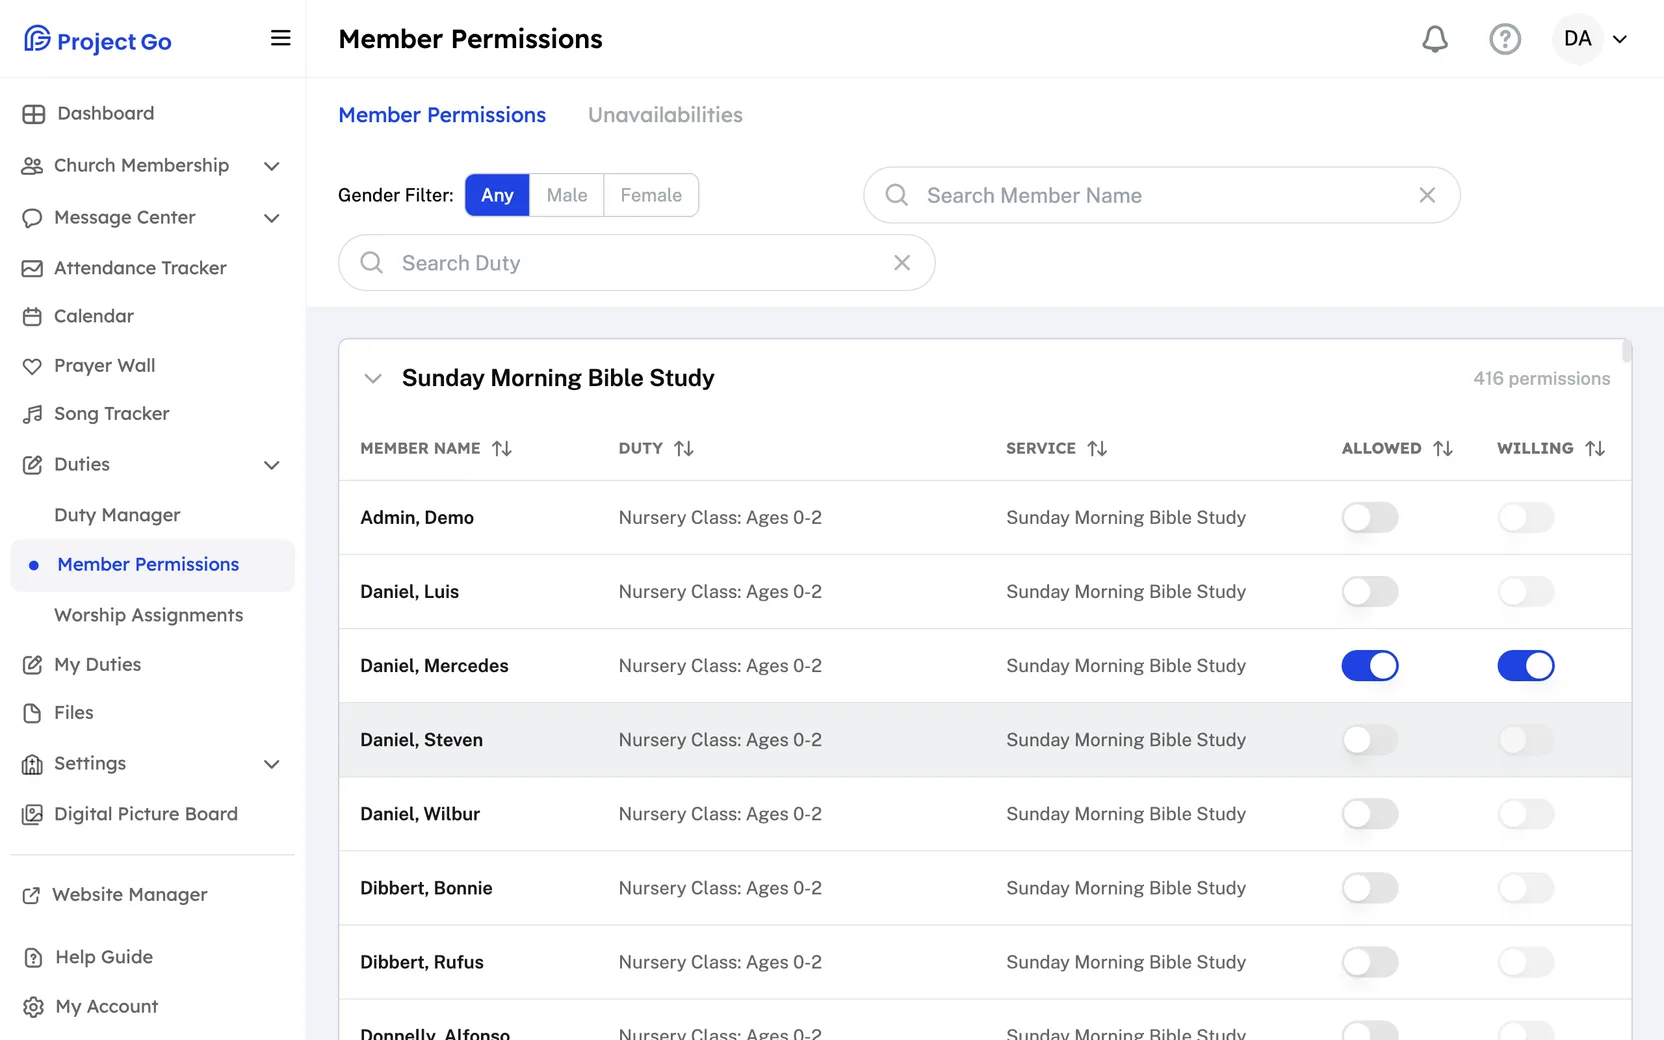
Allow a member to do a duty
The duties come from the Duty Manager. Each row is one member and one duty. Rows are grouped by service.
- Open the Member Permissions tab.
- Click a service name to open or close its rows.
- Find the row for the member and the duty.
- Turn on Allowed.
- Turn on Willing if the member agreed to do this duty.
Each switch saves right away. You see Permission successfully updated.
- Allowed is your decision. Willing is the member's choice. A member needs both turned on to be given the duty.
- Willing is locked until Allowed is on.
- Members can set Willing themselves, for the duties you allowed. See My Duties.
- Click a row to see the member's profile.
Understand who shows up in the list
- A duty set to Male or Female shows only members of that gender. A duty set to Any shows everyone.
- A member with no gender in their profile does not show for Male or Female duties. Add the gender in the Member Directory.
- Former members and inactive members are not listed.
Find a member or a duty
- Next to Gender Filter:, click Any, Male or Female.
- Type a name in Search Member Name.
- Type a duty in Search Duty.
You can use one filter or all three. You do not need a filter to see the list.
Set how a member gets duty reminders
- Click the Reminders tab.
- Find the member. You can type in Search Member Name.
- Click the reminder next to the member's name.
- Click Email Reminder, Text Reminder or Email & Text Reminder.
- In the Member Communication Settings box, click Select Anyway.
- The box warns you that the member may not have picked this way to be contacted. Check Don't show this message again. to skip it next time.
- No Reminder means the member has no reminder set. You cannot choose it from this list.
- The list shows active members who have an account.
- The Reminders tab does not show if text messaging is turned off for your church.
Record when a member cannot serve
- Click the Unavailabilities tab.
- Click Add Unavailabilities.
- Under Member Name, click Select Member and choose the member.
- Click Add new date range.
- In the calendar, click the first day and then the last day.
- Under Unavailability Reason, choose a reason.
- Click Select.
- Click Save.
- The reasons are the same absence reasons used in the Attendance Tracker.
- The list shows Member Name, From and To. Periods that already ended are not listed.
- Members can add their own dates. See My Duties.
Change or delete an unavailability
- On the Unavailabilities tab, find the member. You can type in Search Member Name.
- To change it, click the pencil icon, click Edit date range, pick the new dates or reason, click Select, and then click Save.
- To delete it, click the trash icon, then click Yes, delete.
If something goes wrong
- Please add an Unavailability Reason and a Date Range. Click Add new date range and fill in both. The last day must be after today.
- Name is required: choose a member first.
On a phone
- Click More in the bottom bar, then Duties, then Member Permissions.
- The service groups start closed. Click a service name to open it.
- Click the filter button to open the Filter Permissions panel.