My Duties
My Duties shows the duties you are assigned to. Here you also choose which duties you are willing to do and tell your church which dates you are not available.
Where: Click My Duties in the menu. On a phone, tap the My Duties tab.
Who can use this: Roles with Edit access to My Duties in Role Management.
The page has three tabs: My Assigned Duties, Participation and Availability.
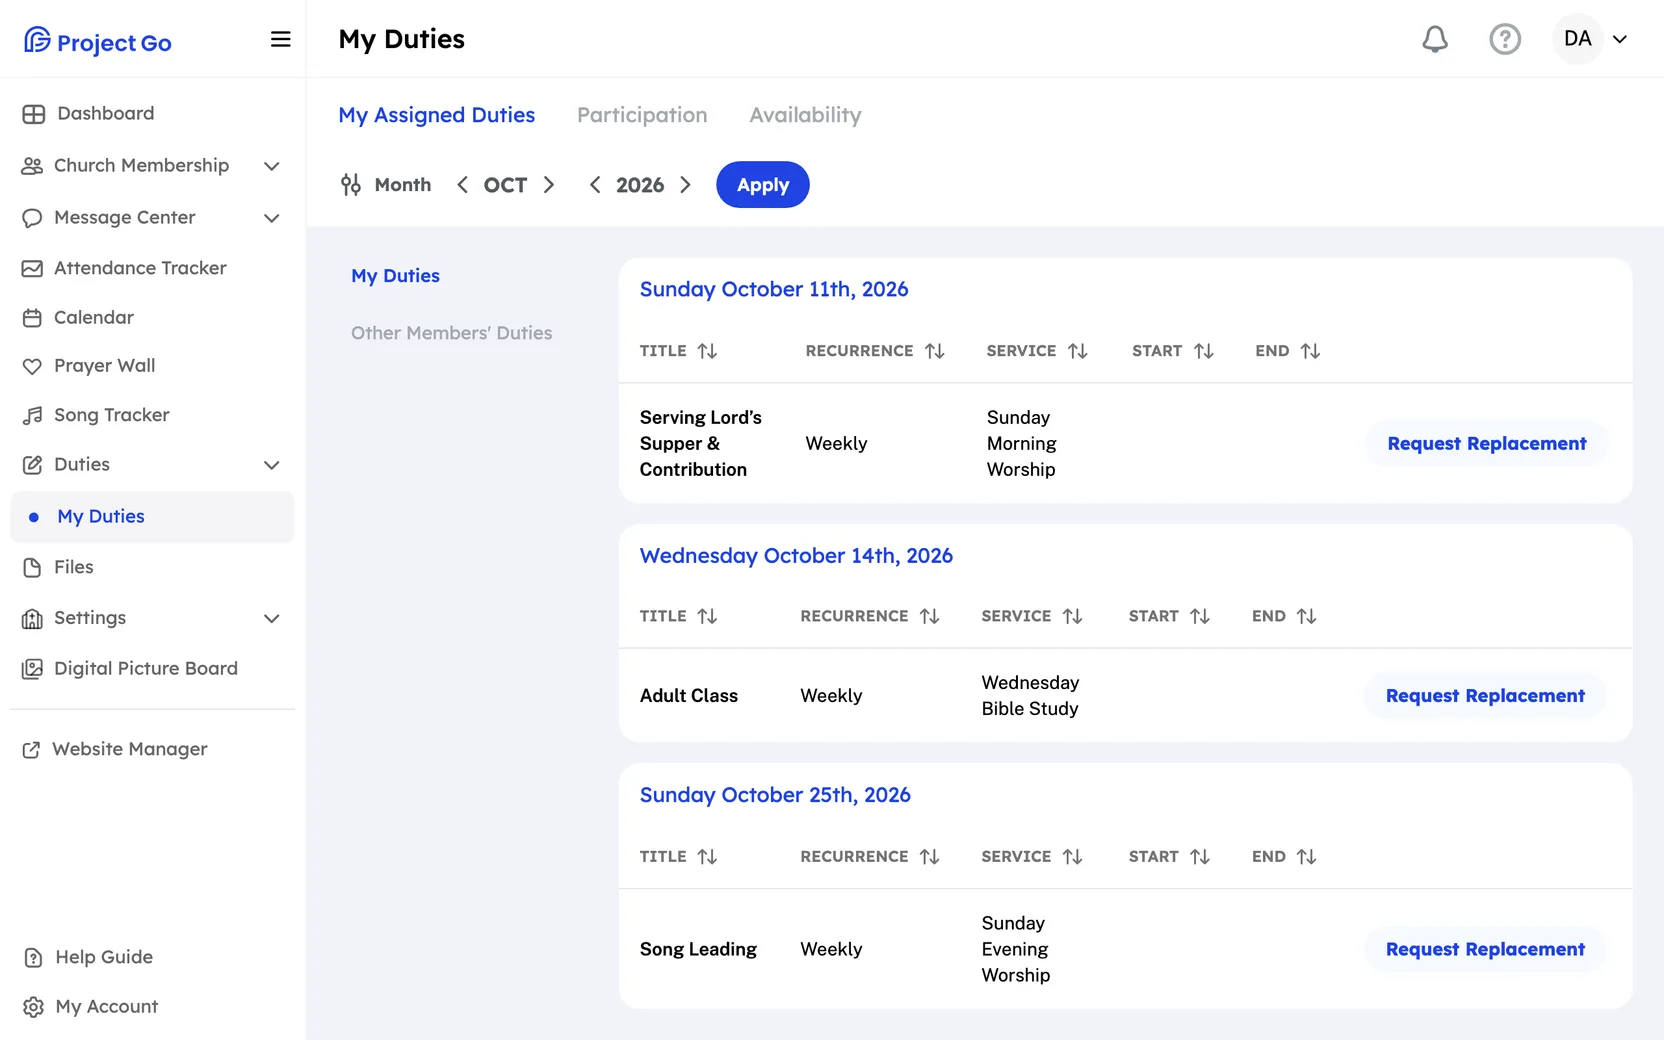
See your duties for a month
- Click the My Assigned Duties tab.
- Use the arrows to choose the month and the year.
- Click Apply.
- Your duties are grouped by date.
- Each duty shows its name, its service, how often it repeats, and its start and end time if it has one.
- A duty you have confirmed shows a Confirmed badge.
- If you have no duties that month, you see "No Duties assigned for the selected month."
See other members' duties
- Click the My Assigned Duties tab.
- Click Other Members' Duties. On a computer it is on the left. On a phone it is at the bottom of the screen, above the tab bar.
- Use the arrows to choose the month and the year.
- Click Apply.
The list shows the member, the position, the service and the time. Only confirmed duties are listed. To go back to your own duties, click My Duties in the same place.
Request a replacement
Do this when you cannot do a duty you were assigned.
- On the My Assigned Duties tab, find the duty.
- Click Request Replacement.
- In the Request a Replacement window, click Yes, Request a Replacement.
The button changes to Replacement Requested and you cannot click it again.
Confirm a duty
When you are given a duty, Project Go Hub sends you a message about it. The message has a link to the duty. The link opens the Job Details window, which has the Confirm button.
- In the message about the duty, click the link.
- In the Job Details window, check the date, the time and the Task Description.
- Click Confirm.
The duty then shows a Confirmed badge. In the same window you can also click Request Replacement, View on Map or Add to Google Calendar. In the phone app on an iPhone, that last button says Add to Calendar.
Choose the duties you are willing to do
- Click the Participation tab.
- Find the duty. Each row shows the duty, its service and how often it repeats.
- Turn the switch on if you are willing to do the duty. Turn it off if you are not.
Your choice is saved right away. There is no Save button. Church leaders also set which duties each member is allowed to do. See Member Permissions.
Add dates when you are not available
- Click the Availability tab.
- Click Add new date range.
- In the Select Dates window, click the first day on the calendar.
- Click the last day.
- Under Unavailability Reason, choose a reason.
- Click Save.
The date range appears in the list with its reason. The list shows only date ranges that have not ended.
Change a date range
- On the Availability tab, click the calendar icon next to one of the dates.
- In the Select Dates window, choose the new days or a new reason.
- Click Save.
Remove a date range
- On the Availability tab, click the trash can next to the date range.
- In the Remove Unavailability window, click Yes, delete.
You cannot undo this.
Set your duty reminders
You choose how and when you are reminded about duties in My Account.
- Open My Account.
- Click the Notifications tab.
- Under Duty Assignment Reminders, turn on the reminders you want: 24 Hs Before Duty, 3 Days Before Duty or 7 Days Before Duty.
- Click Update.
For all the choices, see My Account.
If something goes wrong
| Message on the screen | What to do |
|---|---|
| "A start date is required." | Click a first day and a last day on the calendar. |
| "End date cannot be in the past" | Choose a last day that is after today. |
| "Reason is required" | Choose a reason under Unavailability Reason. |