Account Approvals
When someone signs up for your church in Project Go Hub, their request waits here. You accept or deny each request. To see how people sign up, read Sign Up and Log In.
Where: In the menu, click Church Membership, then Account Approvals. A number next to the menu item shows how many requests are waiting.
Who can use this: You need Edit access to Account Approvals, set in Role Management. This screen has no View level.
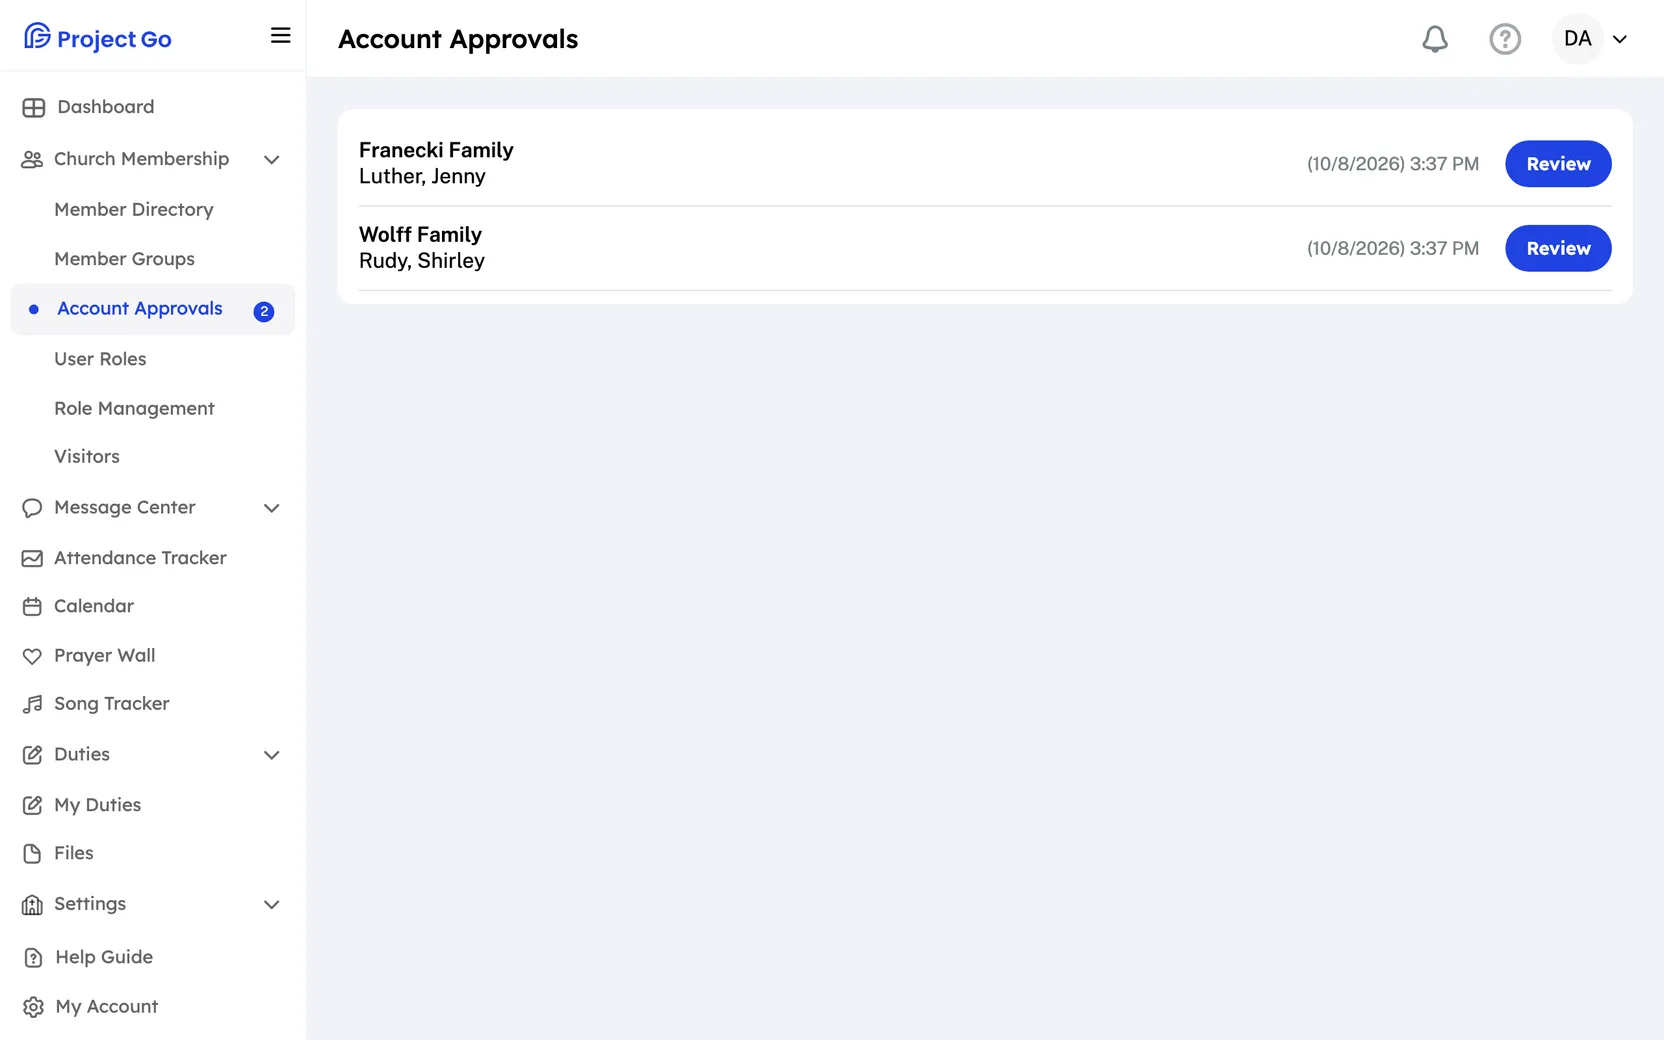
Review a request
- Find the person or family in the list. The oldest request is at the top. Each row shows the date and time of the request.
- On the right of the row, click Review.
- Read the Member Profile window. It shows the name, email and phone number.
- For a family, click each name on the left to see that person. A star (*) marks the husband and the wife.
Accept a request
- On the request, click Review.
- At the bottom of the window, click Accept Request.
- In the Email Notification window, click Done.
The window tells you that an email was sent to the member to say the request was approved. The request leaves the list.
Fill in the member's profile after you accept
- Accept the request as shown above, but do not click Done.
- In the Email Notification window, click Complete Member Profile.
- Fill in the profile and click Save.
The profile form is the same one used in the Member Directory.
Deny a request
- On the request, click Review.
- At the bottom of the window, click Deny.
You see the message Request denied and the request leaves the list.
Note: Deny works right away. There is no second step to confirm. To leave a request waiting, close the window with the X.
Review requests from the Dashboard
- In the menu, click Dashboard.
- In the Needs Attention card, find Account requests.
- Click Review on a request.
The card shows the three newest requests. If there are more, click the link under them (for example, Show 2 more) to see the rest. Read more in Dashboard.
On a phone
In the bottom bar, click More, then Church Membership, then Account Approvals. The steps are the same.