Calendar
The Calendar shows your church's events, plus member birthdays and wedding anniversaries. With Edit access you can also add, change, delete and export events.
Where: In the menu, click Calendar.
Who can use this: You need View or Edit access to Calendar, set in Role Management. View access lets you see events. Edit access adds the Create New Event and Export Calendar buttons and the edit and delete icons.
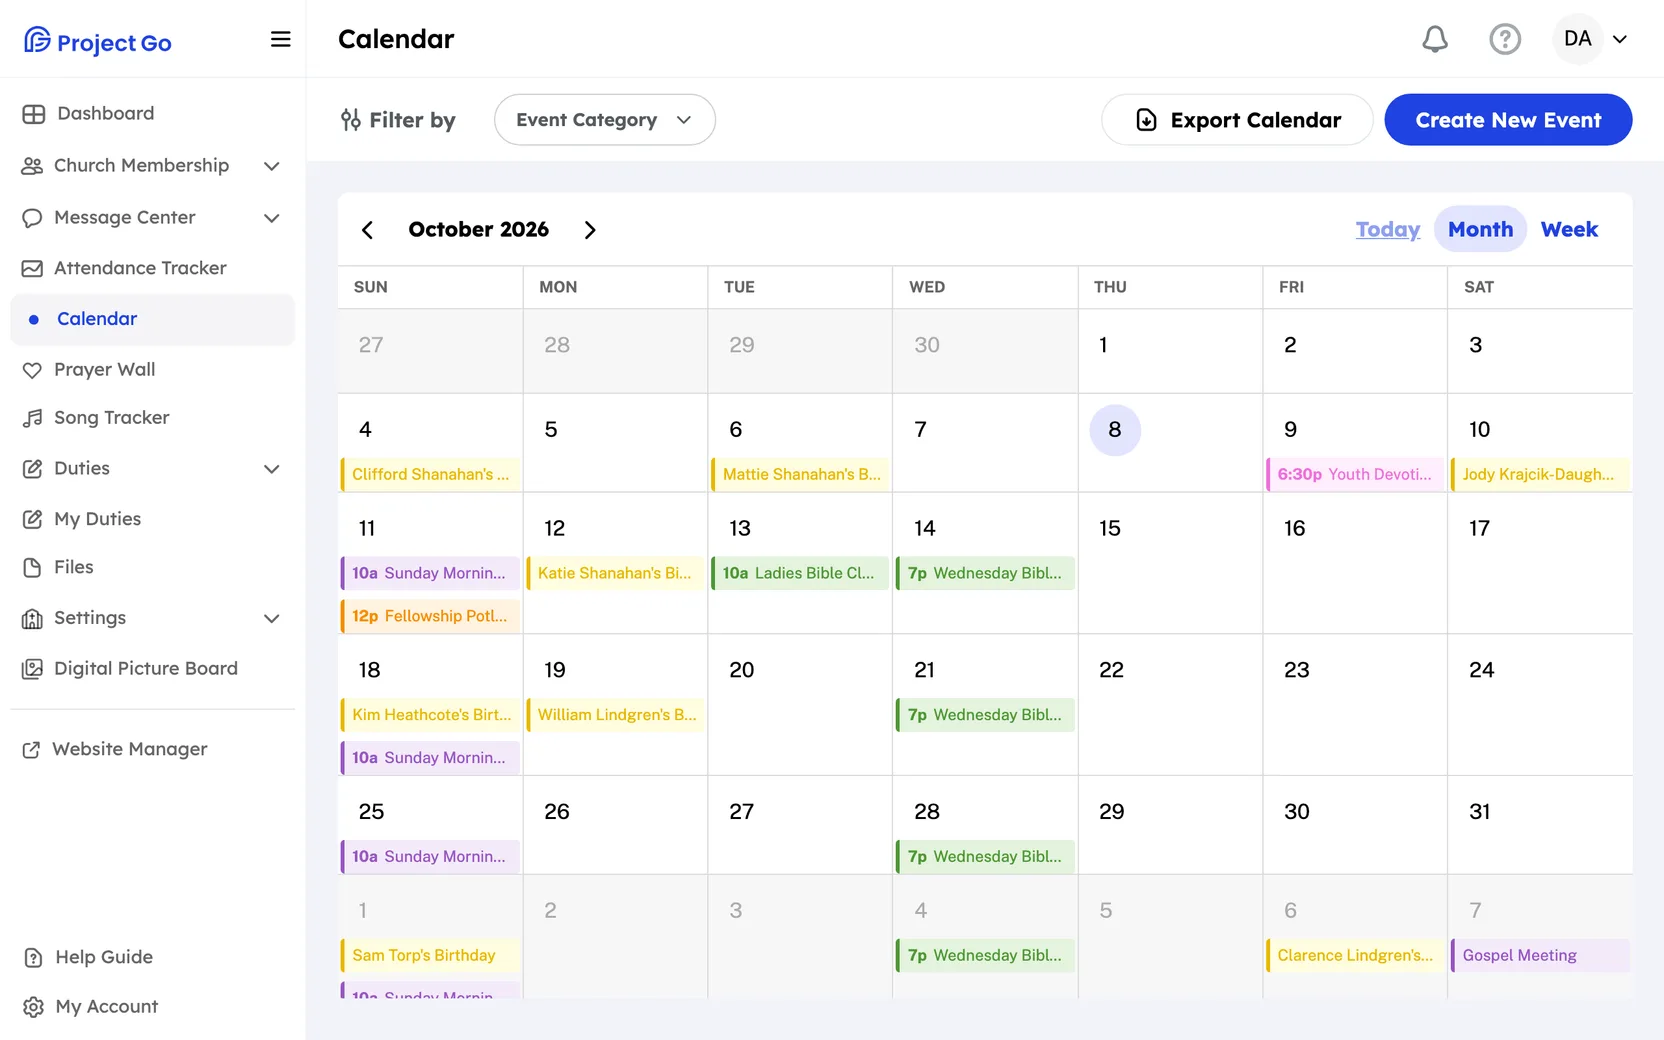
Move around the calendar
- In the top right, click Month or Week to change the view.
- In the top left, click the arrows to go back or forward.
- Click Today to come back to today.
- Click the date title between the arrows to open a small calendar. Click a date there to jump to the week of that date.
See the details of an event
- Click the event on the calendar.
- Read the Event Details window. It shows the name, category, date, time, description, who the event is for, and the location.
If the event is for everyone, the window shows All Church Members. If not, it lists the groups and members.
Filter events by category
- Above the calendar, click Event Category.
- Check each category you want to see.
The calendar shows only the checked categories. Uncheck them all to see every event again. Birthdays and Anniversaries are in the list too.
Add an event to your own calendar
- Click the event on the calendar.
- At the bottom of Event Details, click Add to Google Calendar.
Google Calendar opens in a new tab with the event filled in. In the iPhone app the button says Add to Calendar and adds the event to your iPhone's calendar.
Add an event
- In the top right, click Create New Event. You can also click an empty day on the calendar.
- In Event Name:, type the name.
- In Event Category:, click a category.
- Set the Start Date:. For an event that lasts more than one day, also set the End Date:.
- Set the Start Time: and End Time:.
- In Repeat:, choose how often the event repeats.
- In Add Members: and Add Groups:, choose who the event is for. Leave both empty for an event for all members.
- If you want, fill in Add Location: and Description:.
- Click Save.
You see the message New Event Created! and the event appears on the calendar.
- Required: Event Name, Event Category, Start Date, Start Time, End Time.
- The end time must be later than the start time.
- There is no all-day option. Every event needs both times.
Make an event repeat
In the event form, Repeat: has these choices:
- None, Daily, Weekly, Monthly, Yearly
- Custom, for patterns like every 2 weeks or the first and third Thursday
To set a custom pattern:
- In Repeat:, click Custom.
- In Frequency:, choose Weekly or Monthly.
- After Every, type how many weeks or months pass between events.
- For Weekly, click each day of the week the event happens on.
- For Monthly, choose On day of month or On specific weekday(s). For weekdays, pick the position (First to Last) and the day.
- Click Confirm.
Add an event category
- In the event form, click Event Category:.
- At the bottom of the list, click Add New Category.
- In Category Name:, type the name.
- In Category color:, choose a color.
- Click Add Category.
Colors: Blue, Yellow, Green, Red, Violet, Pink, Dark Blue, Orange. Events show in the color of their category.
Delete an event category
- In the event form, click Event Category:.
- Next to the category, click the trash icon.
- Click Yes, delete.
Note: You cannot undo this. The Birthdays and Anniversaries categories are built in and are not in this list.
Change an event
- Click the event on the calendar.
- In the top right of Event Details, click the pencil icon.
- If the event repeats, choose This Event or Edit all occurrences, then click Continue.
- Make your changes in the form.
- Click Save.
- Click Update to confirm.
Delete an event
- Click the event on the calendar.
- In the top right of Event Details, click the trash icon.
- If the event repeats, choose Delete this event or Delete this and subsequent Events.
- Click Delete.
Export the calendar
- In the top right, click Export Calendar.
- Choose a format.
- For Monthly Grid PDF, also choose the month under Select month:.
- Click Export Calendar.
| Format | What you get |
|---|---|
| Google Calendar | An iCalendar (.ics) file for Google Calendar |
| Apple Calendar | An iCalendar (.ics) file for Apple Calendar or Outlook |
| CSV Spreadsheet | A CSV file for Excel or Google Sheets |
| Monthly Grid PDF | A printable calendar page for one month |
The export includes regular events, birthdays and anniversaries.
Birthdays and anniversaries
- The calendar adds a birthday for each current member who has a birth date in the Member Directory.
- It adds an anniversary for each family that has an anniversary date and both a husband and a wife who are current members.
- Former and deceased members are left out.
- You cannot edit or delete these on the calendar. Change the date in the Member Directory.
On a phone
- In the bottom bar, click More, then Calendar.
- The views are Month and Agenda. Agenda lists the month's events with their full names. There is no Week button.
- The category filter is behind the funnel icon. The export and create buttons show as icons only.
- In the phone app, the export window has one calendar choice (Add to Calendar on iPhone, Add to Google Calendar on other phones) in place of the Google Calendar and Apple Calendar choices.
If something goes wrong
- This field is required: fill in the field marked in the form.
- End time must be after start time: set a later end time.
- End date must be after or equal to start date: fix the End Date.
- Select at least one day of the week.: in Custom Recurrence, click a day.
- Something went wrong: the event or category was not saved. Try again.