Files
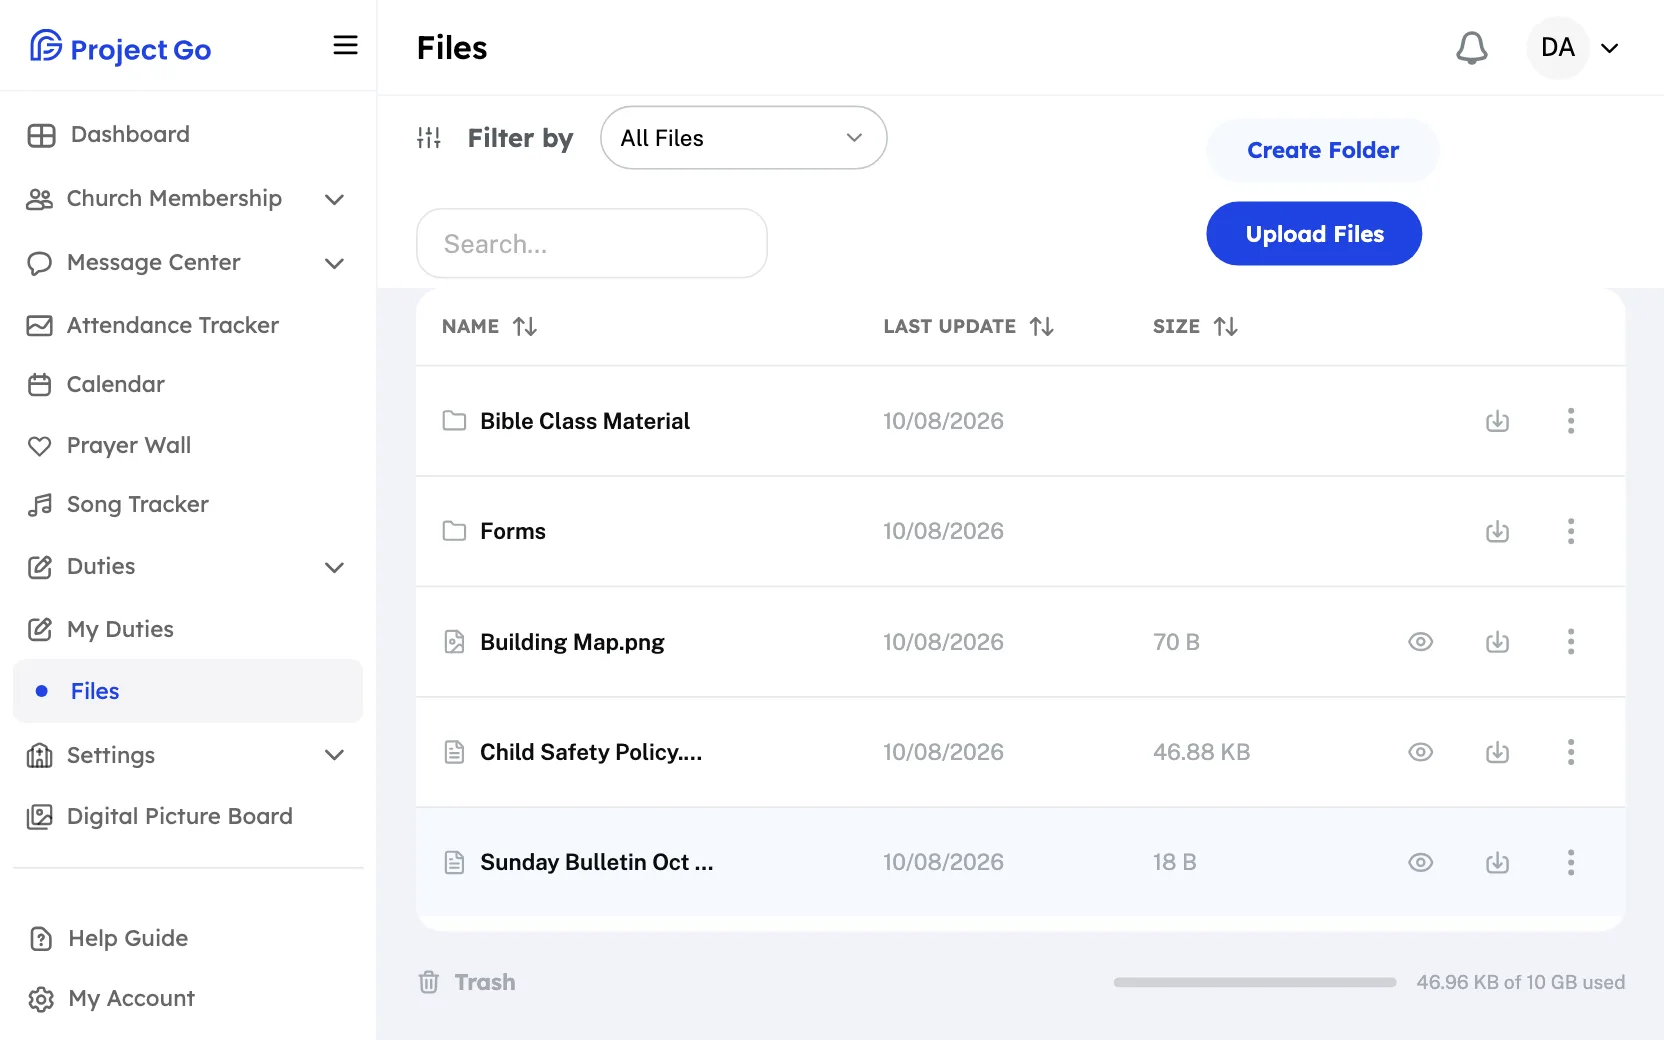
Files is your church's shared file library. You can open folders, find files, view them and download them. People with the right access can also add and change files.
Where: Click Files in the menu. On a phone, tap More, then Files.
Who can use this: You can open folders, search, filter, view and download. These show only for a role with Edit access to Files: the Create Folder and Upload Files buttons, the three dots on each row, and the Trash link and storage bar at the bottom of the page.
Open a folder
- Click the folder's row in the list.
- To go back, click Files or a folder name above the list.
The names above the list show where you are, starting with Files. They show only when you are inside a folder.
Find a file
- Above the list, type part of the name in Search....
- To show one kind of item, choose it in the file type list next to Filter by.
Search and the file type list work on the folder you have open. The file type list starts with All Files. It then lists only the kinds that are in the folder, from these: Folders, Images, Videos, Audio, PDFs, Presentations, Spreadsheets, Documents, Archives, Text Files and Other Files. To sort the list, click the Name, Last Update or Size heading.
View a file
- Find the file in the list.
- Click the file's row. On a computer, you can also click the eye icon on the right of the row.
A picture, video or audio file opens in a window with the file's name at the top and a Download button. Any other kind of file opens in a new browser tab. Folders have no eye icon.
Download a file or a folder
- Find the file or the folder in the list.
- On the right of its row, click the download arrow. On a phone, if you can edit Files, tap the three dots on the row, then Download.
A folder downloads as a zip file. In the phone app, folders do not download. See "Use Files in the phone app" below.
Upload files
- Open the folder where the files should go. To add them at the top level, do not open a folder.
- Click Upload Files.
- In the Upload New Files window, drag your files onto the box, or click browse computer and choose them.
- Check the names under Selected Files. To drop one, click the X next to it.
- Click Upload Files.
The button shows how far along you are, such as Uploading 1 of 3.... Each file shows its own result. When every file works, you see Upload successful and the window closes. Each file can be up to 100 MB.
To add every file inside a folder from your computer, click Upload a folder in the same window and choose the folder. Its files go in one by one. It does not make a folder in Files.
Create a folder
- Open the folder where the new folder should go. To add it at the top level, do not open a folder.
- Click Create Folder.
- In Folder Name:, type the name.
- Click Create.
Rename a file or a folder
- On the right of its row, click the three dots, then Rename.
- In the Rename window, change the name in Name:.
- Click Save.
Move a file or a folder
You can move an item only into a folder you can see in the list.
- Open the folder that holds the item and the folder you are moving it to.
- On the right of the item's row, click the three dots, then Move.
- In the window, click the name of the folder to move it to. To move it out to the folder above, click .. Up one level.
The item moves right away. There is no confirm button. If the folder has no folders in it, you see "No subfolders here."
Delete a file or a folder
- On the right of its row, click the three dots, then Delete.
- In the Delete File window, read the question.
- Click Yes, delete.
When you delete a folder, the window warns you: "This folder and all its contents will be deleted." The window also says you can restore the item from Trash.
Restore a deleted item
- At the bottom of the page, click Trash.
- Find the item. The list shows its Name and when it was Deleted.
- Click Restore on its row.
- To leave Trash, click Back to Files.
Restore puts the item back where it was.
Check how much space you have used
At the bottom of the page, next to Trash, a bar and a line that reads "(amount used) of (total) used" show how much space your church has used and how much it has in all. The bar changes color when 80 percent is used, and again when it is full. Only a role with Edit access to Files sees this.
Use Files in the phone app
- Each row shows the file size and date under the name. Tap a file to open it. To download, tap the download arrow on the row. If you can edit Files, tap the three dots on the row to see all its actions.
- A picture, video or audio file opens inside the app. Any other file opens outside the app, in your phone's browser.
- A folder does not download. You see Download the folder from a computer and this message: "Folder downloads work in a web browser. In the app, open the folder and download files one at a time."
For more about the phone app, see Use Project Go Hub on a phone.
If something goes wrong
| Message on the screen | What to do |
|---|---|
| "This file is larger than the server accepts." | Choose a smaller file. |
| "Upload failed. Check your connection and try again." | Check your connection, then upload the file again. |
| "Upload completed with errors" | Read the red message under each file that did not go up. The files with a green check did go up. |
| "Download the folder from a computer" | Use a computer to download the folder, or open it and download its files one at a time. |